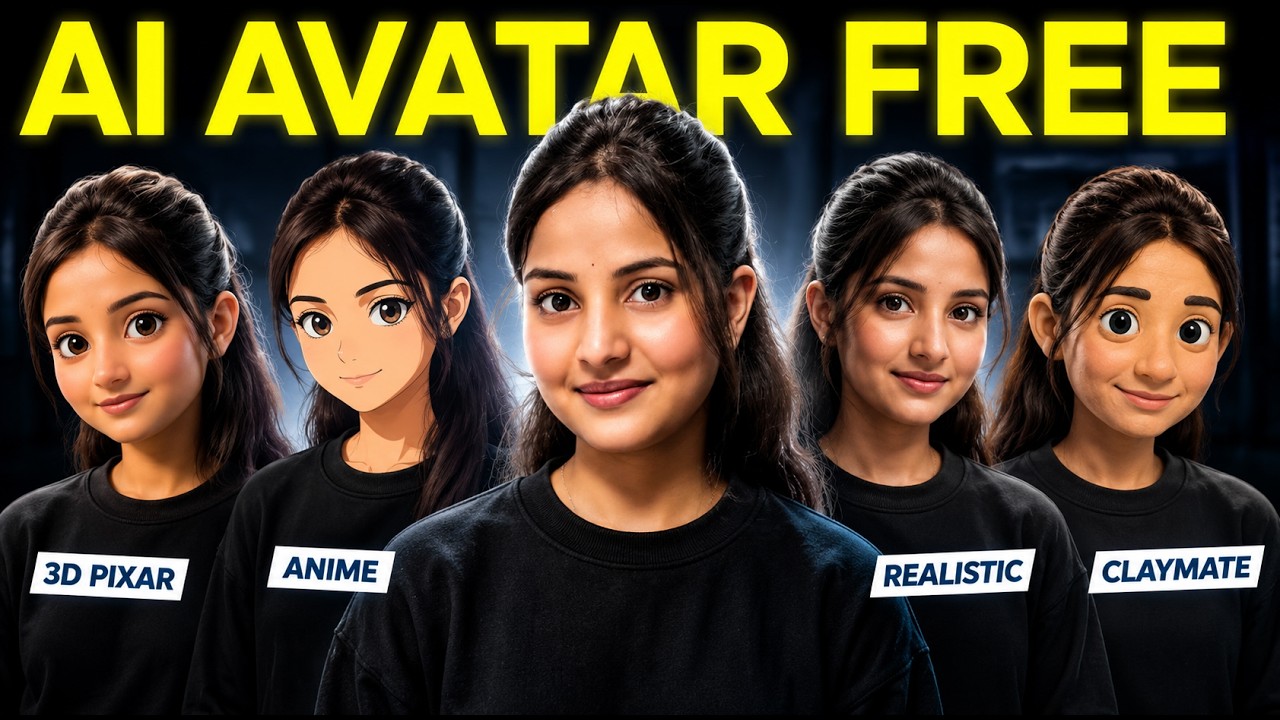
Imagine taking a single photograph and transforming it into a digital character that moves its hands, changes expressions, and speaks your dialogue with synchronized lips.
AI tools have made this type of content creation much easier.
Instead of manually animating a character, creators can now combine AI image generation, image-to-video technology, and automatic lip synchronization to build talking avatars for YouTube, Instagram, educational content, and marketing videos.
In this guide, we’ll explore the complete process of turning a photo into a talking AI character.
Why Are AI Avatars Becoming Popular?
Traditional video production requires a camera, lighting, location, repeated recordings, editing, and sometimes an entire production team.
AI avatars can simplify part of that workflow.
Once you’ve created a consistent digital character, you can potentially reuse it across multiple videos and generate new dialogue without filming every scene from scratch.
This is particularly useful for creators producing frequent educational or informational content.
Start With the Right Photo
The quality of your avatar depends heavily on your starting image.
Choose a clear photograph where the person’s face is visible and recognizable.
If you don’t have a suitable photograph, you can take a screenshot from a high-quality video.
Try to avoid frames containing excessive motion blur, unusual facial expressions, heavily obscured faces, or extremely dark lighting.
A clean reference makes it easier for an AI model to understand the subject.
Transform Your Photo Into a Digital Character
The next step is deciding what your AI avatar should look like.
You don’t have to keep it completely realistic.
For example, you can transform yourself into a stylized 3D animated character while retaining recognizable facial features.
Upload your reference image to an AI image generator and describe the style you want.
A simple prompt could be:
“Transform the uploaded person into a polished 3D animated character while preserving recognizable facial features, hairstyle, expression, and overall identity.”
You can customize the prompt depending on your preferred visual style.
Realistic vs Cartoon AI Avatars
Both styles have advantages.
A realistic avatar can work particularly well for business videos, educational content, tutorials, personal branding, and professional explainers.
A cartoon or stylized avatar can be more attention-grabbing for Shorts, Reels, entertainment content, storytelling, and AI-focused channels.
The right option depends on your content.
If your brand is professional and educational, realism may work better. If your videos are entertaining and highly visual, a stylized character could help you stand out.
Give Your Avatar Natural Movement
A static character with moving lips can quickly look artificial.
That’s why adding body movement before creating the talking version can significantly improve the result.
Take your generated avatar image and upload it to an image-to-video AI tool.
Ask for subtle presenter-style movements.
The character might move its hands gently while explaining something, blink naturally, slightly change its facial expression, make small head movements, and maintain eye contact with the camera.
Keep these movements controlled.
The avatar will eventually need to speak, so excessive head turns and dramatic movements can make the final lip synchronization less convincing.
Why You Shouldn’t Add Speech Immediately
The first video-generation stage should primarily focus on movement.
You want to create a clean base animation containing natural body language.
Once that animation is ready, you can use a dedicated AI avatar or lip-sync tool to add the actual dialogue.
This two-stage approach gives you more control.
Instead of asking one AI model to generate appearance, movement, speech, gestures, and lip synchronization simultaneously, each tool performs a more specific task.
Add Your Voice With AI Lip Sync
Once your animated character is ready, upload the video to a talking-avatar platform such as DreamFace AI.
You can then provide the dialogue.
Depending on the available features, this can be done by entering text and selecting an AI voice or uploading a prerecorded audio file.
If you’re building a digital version of yourself, uploading your own voice can make the character feel more personal.
The AI analyzes the audio and automatically adjusts the mouth movements to synchronize them with the speech.
The Secret to More Natural AI Avatar Videos
Timing matters.
If you’ve created a 10-second animation, try to provide approximately 10 seconds of dialogue.
A large mismatch between the animation and audio duration can reduce the natural feeling of the final output.
Instead of generating a very long video at once, divide your script into smaller sections.
For example, a 60-second script could be separated into several short scenes.
Create each avatar segment separately and combine them in your video editor afterward.
Make Longer Videos More Interesting
Using the exact same avatar shot for an entire video can become repetitive.
Introduce small visual changes between segments.
One section could show the avatar in a medium shot. Another could use a slightly closer camera position. A third could include different hand gestures.
You can also add B-roll footage, screenshots, screen recordings, text graphics, icons, or examples between avatar sections.
This creates a more professional editing rhythm.
Improve the Final Video
Once the talking avatar has been generated, review the quality.
Look closely at the mouth, eyes, hands, and facial features.
If your platform provides an enhancement feature, you can use it to improve the perceived quality of the final video.
You can then take the clips into your preferred video editor.
Add subtitles, background music, sound effects, transitions, graphics, and B-roll if appropriate.
For vertical content such as Instagram Reels and YouTube Shorts, consider creating your avatar in a 9:16 composition from the beginning.
What About Watermarks?
Some free AI platforms may place branding or watermarks on exported videos.
Check the platform’s current export options and terms.
Some services may provide watermark-free exports through free credits, trials, paid plans, or specific account options.
For professional or commercial projects, it is usually better to use an export method permitted by the platform rather than relying on techniques that may violate its usage conditions.
Best Practices for Professional AI Avatars
Consistency is extremely important.
If you are creating multiple clips featuring the same character, maintain the same facial identity, hairstyle, clothing, lighting, and general visual style.
Keep gestures natural and relatively subtle.
Use high-quality audio because background noise can negatively affect the final presentation.
Also avoid putting all of your information into one long AI-generated shot. Breaking the video into shorter scenes usually gives you more opportunities to fix errors and improve pacing.
Who Should Use AI Avatars?
AI avatars can be valuable for YouTubers, social-media creators, digital marketers, teachers, online educators, small businesses, faceless content creators, and anyone experimenting with AI-generated videos.
They’re particularly useful when you need to produce presenter-style videos frequently.
However, AI avatars work best when they support good content rather than replace it. Your script, information, storytelling, editing, and presentation still determine whether viewers actually enjoy the video.
Final Thoughts
Turning a photograph into a talking AI character no longer requires professional 3D animation skills.
You can divide the process into a few simple stages:
Choose a Photo → Create the Character → Animate the Character → Add Your Voice → Generate Lip Sync → Enhance and Edit
The most important technique is separating character animation from speech generation.
First create natural hand gestures and body movements. Then add your voice and lip synchronization.
This approach can make your final AI avatar feel much more dynamic and engaging, whether you’re creating YouTube tutorials, Instagram Reels, Shorts, educational videos, or AI-generated social content.